Battery Repeater
This is a refinement of what I built the first time, but with a design towards something that could become a very simple solar node also.
You're sticking a very efficient CPU & LORA radio combination on a tiny power management board that can work with USB, Solar, and Battery power sources. Then attaching a great value antenna to a waterproof box you get at the hardware store and then for a battery, just a hobbyist 5k mAh LiPo battery that already has short circuit protection is used to power it.
WARNING (marque tag) RAK Polarity Notes

Parts
- RAK Wireless 4631 Controller
- RAK Wireless Mini power board, battery, usbc, solar
- LoRa Antenna with Pigtail
- 5000 mAh LiPo Battery
- Waterproof / resistant bulkhead SMA pigtails you want the ones with the red gasket on them
- Waterproof junction box / enclosure. UK alternative, IE alternative.
- 2.0 JST power connectors
- Some wago connectors - if you don't need 100
- Self Amalgamating Waterproof tape
Process
- Drill a 6mm-7mm diameter hole in one side of the waterproof enclosure. I found using a 6mm bit and then widening the hole slightly by hand with a step bit gave the best results. Using a step bit by itself you are likely to make the hole too big too fast and now your water proof box has a really annoying hole in it.
- Fit one of the waterproof SMA connectors in the new hole, it should just barely fit. The outside bolt can be turned with a 8mm hex wrench while you use a 11mm wrench to hold the inside in place.
- Attach the antenna, put the whole thing aside
- Inspect the RAK Wireless Power Board, don't plug the battery in yet, but it will probably have the ground (black wire) on the wrong side. The easiest way to fix this is use a male and female 2.0 JST cables to make a crossover power cable - red to black, black to red. Join them with the wago connectors. This also makes it easier to disconnect the battery than trying to pull a plug out of the board. Don't yet attach the battery.
- Attach the RAK 4631 tiny board to the Power Board, use the little screws to make sure it is connected properly.
- Attach the pigtail from the SMA connect in the waterpoof box to the LORA connector on the 4631
- Attach the bluetooth antenna included with the 4631
- Add the tiny LoRa antenna to your growing pile of tiny lora antenna
- Plug your computer into the USB C port of the board and flash it just like you did the Attic Repeater
- Connect to the Repeater from your companion as an Admin (you've set and remembered an admin password right?) and using the CLI make sure you've set
powersaving on- you can check if you have done that already just typingpowersaving - Great, it works!
- Triple check how the battery will connect to the power board, with the USB C pointing away from you:
- The red wire from the Battery should be connected to the left side of the bigger port
- The black wire should be connected to the right side
- Theres plenty of videos show how to change JST polarity, just do it on the pigtail you bought not directly on the batteries connector if you're afraid of shorting out the battery.
- Plug the battery into the board
- Plug the board into USB power source, it may take a few hours until the battery is fully charged. The charge light will turn off on the board when it is full enough and you can check the charge level by checking the repeater status and telemetry information in the MeshCore client.
- If everything checks out as good seal up the enclosure and use some of the self amalgamating tape to wrap around the base of the antenna to make it watertight.
- Place it somewhere and update the repeater position information with the "close enough" coordinates to it. Take a photo of where you placed it also, so you remember when you come back in two weeks.
Photos
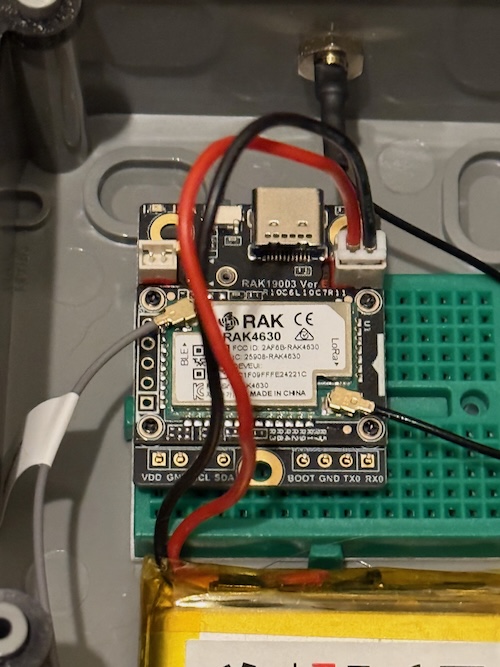
Closeup of the board with the battery connected. Note that the black, ground, cable is on the right:
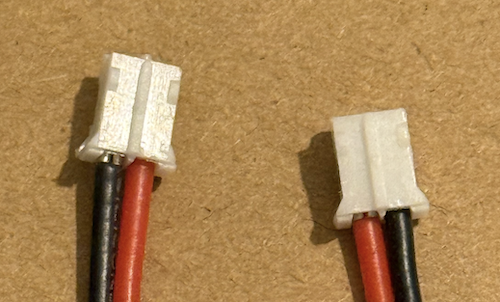
On the left is the battery connector as they usually arrive, on the right is the modified one for use with the RAK Wireless board:
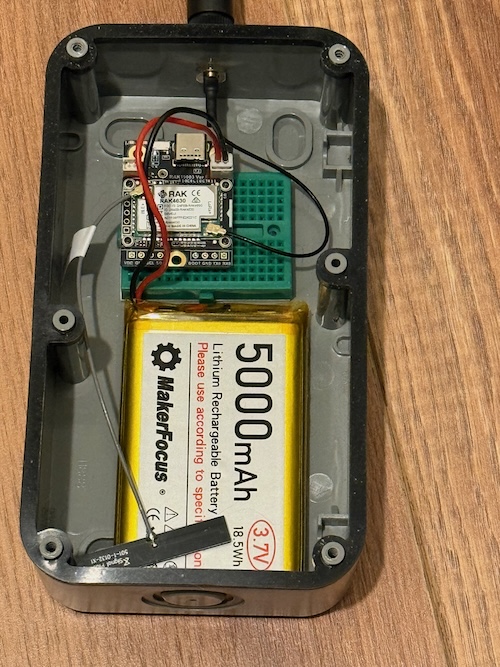
The full contents of a battery node box. You can fit more batteries in here, like four 21700 lithium ion cells, if you know what you're doing.
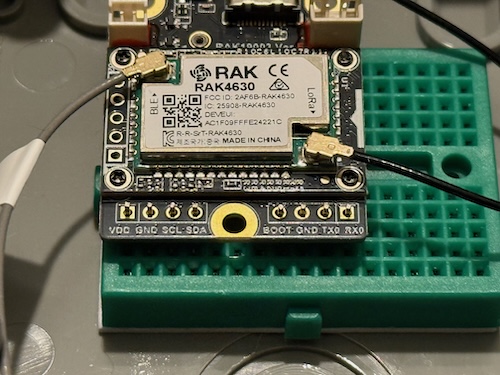
If you really wanted to go to town you could solder some header pins onto the RAK Wireless board. You don't need to use them for anything, but they do provide an anchor to the breadboard. Make sure you aren't plugging them into a connected row (in this view, the vertical columns are all connected).
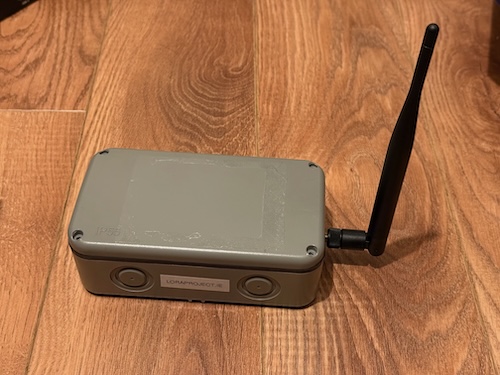
The finished product, make sure to label it clearly.